This website uses cookies. By clicking Accept, you consent to the use of cookies. Click Here to learn more about how we use cookies.
Turn on suggestions
Auto-suggest helps you quickly narrow down your search results by suggesting possible matches as you type.
- Revenera Community
- :
- FlexNet Publisher
- :
- FlexNet Publisher Knowledge Base
- :
- Send Vendor Information to Flexnet Operations During Activation
Subscribe
- Mark as New
- Mark as Read
- Subscribe
- Printer Friendly Page
Send Vendor Information to Flexnet Operations During Activation
Send Vendor Information to Flexnet Operations During Activation
Summary
How To Send Vendor Information to Flexnet Operations During ActivationSynopsis
It is useful sometimes to collect information from a customer during activation to help with statistical analysis of your customer base. In order to collect this information the Vendor Dictionary functionality available in FNP and FNO can be used which gives the publisher the ability to send information in the activation request that can be stored and processed by FNO.This article provides steps to configure Flexnet Operations(FNO) and Flexnet Publisher(FNP) for sending vendor information from an FNP activation to FNO and store that information.
Discussion
Configure FlexNet Operations
Create a custom attribute that you want store in FNO
1. Click, Administer operations->Add Custom Attribute
2. Click, "Add a License Model Attribute"
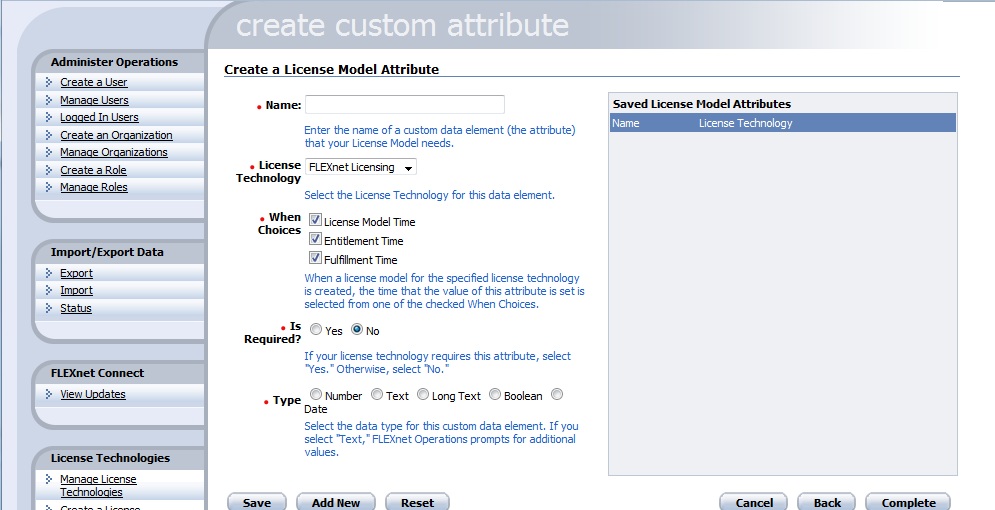
3. You will be shown the following screen:

- For the name field, enter the name that is required, in this instance the name "test" will be used.
- Select the license technology that is required, by default this is "FLEXnet Licensing"
- To allow the attribute to be populated at fulfillment time, i.e. during activation, select the "Fulfullment Time" option for the When Choices field.
- Select yes or no for "Is Required"
- For Type select the type of information that is going to be gathered, in this instance "Text" is being used. This will give you options for how you want this variable to be entered, select the appropriate method.
- There will now be an option for allowing the attribute to be used in reporting. Select the appropriate option.
4. Add the custom attribute to the license model:
- Click, Package Products->Manage License models
- Select the License model that you want to add this to. In this instance "Retail Activation" is being used.
- Click next on the first license model screen so that the Custom Attributes screen shows.
- The custom attribute should be listed but will show as "Not Used". Change this to "Fulfillment time" and Save.
Activate a license from FNP and send the Vendor information to the custom attribute in FNO
This should produce output in the console window similar to the following:
Status: 4, Creating request
Status: 5, Request created
Status: 6, Context created
Status: 7, Connected to remote server
Status: 8, Request Sent
Status: 9, Polling for response
Status: 10, Waiting for response
Status: 9, Polling for response
Status: 10, Waiting for response
Status: 9, Polling for response
Status: 10, Waiting for response
Status: 9, Polling for response
Status: 11, Done
Response processed successfully. Actions were:
Create fulfillment "FID__71f7a1eb_13a44c4f5f7__7ffa"
Check that the information has now been sent to FNO
- Click the Support Licenses tab.
- Select the Fulfillment that has been geenrated from the the activation that was processed.
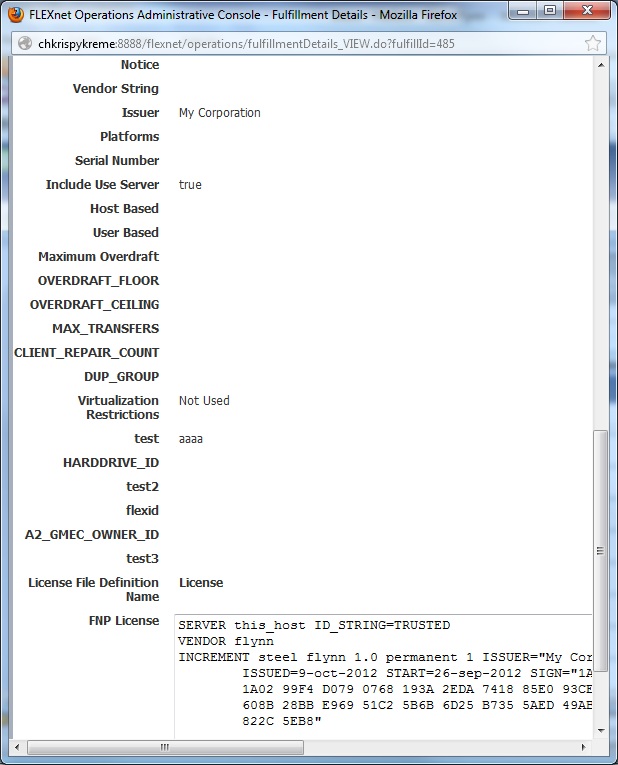
- The Custom attribute and the value sent should be listed in the fulfillment record, as in this screen shot:

No ratings