- Flexera Community
- :
- Spider
- :
- Spider Knowledge Base
- :
- Copy and create a new report (Spider Admin Tool)
- Subscribe to RSS Feed
- Mark as New
- Mark as Read
- Subscribe
- Printer Friendly Page
- Report Inappropriate Content
- Mark as New
- Subscribe
- Mute
- Subscribe to RSS Feed
- Permalink
- Report Inappropriate Content
- Article History
- Subscribe to RSS Feed
- Mark as New
- Mark as Read
- Subscribe
- Printer Friendly Page
- Report Inappropriate Content
Open the Spider Admin Tool
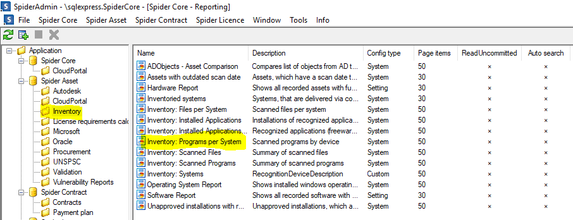
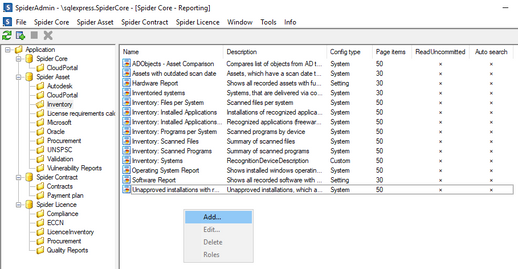
Click on Spider Core Reporting
For this scenario we have clicked on 'Inventory' and selected 'Inventory: Programs per System'
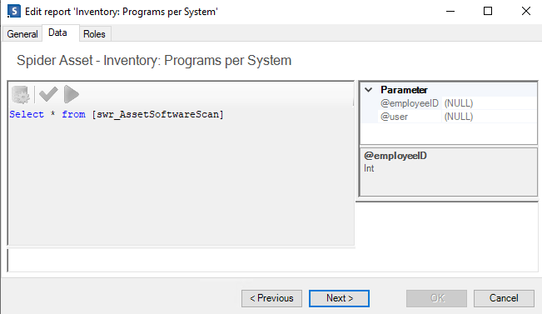
Below shows the actual SQL query in the 'Data' tab please note, you cannot edit this Standard Report
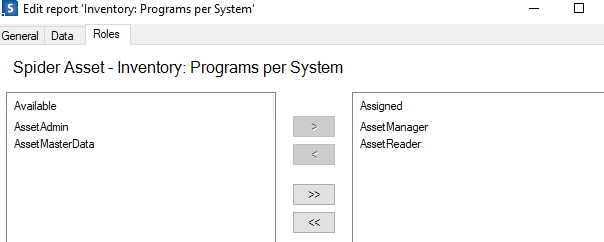
Allocated roles on the 'Roles' tab
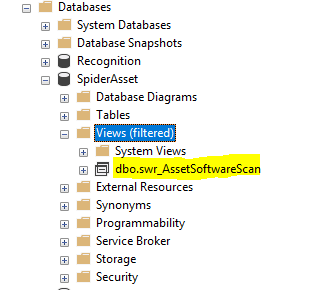
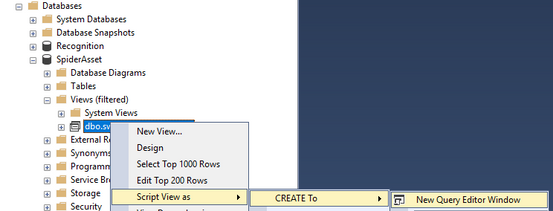
Find the View which is being queried in SQL Server Management Studio
Right-click Views and filter for swr_AssetSoftwareScan
Then open it in a New Query Editor Window with ‘Script View as’ and ‘Create To’
Change the name of this query, for example add CUST, then click on Execute (run query)
The changed query has been saved and can be found as a new View
Make the required changes to the Query with ‘Script View as’ and ‘Alter To’ and save it (Ctrl + S or File - Save)
Now you are ready to create a new report in the Spider Admin Tool
Right-click in the blank area of the Report Windows and click on Add…
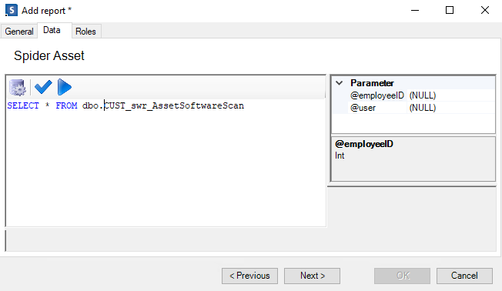
Complete the Name and Description Fields on the ‘General’ tab, add the Query Statement on the ‘Data’ tab and assign the Roles on the ‘Roles tab. You can test the query by clicking on the blue arrow.
On the ‘General tab’ put a tick in both the tick boxes for ‘Auto Search’ and ‘Read uncommitted’
Click Next and then OK to save this
The new report will now be visible in the Spider Reports Web interface
Sep 22, 2022 01:09 AM

