This website uses cookies. By clicking Accept, you consent to the use of cookies. Click Here to learn more about how we use cookies.
Turn on suggestions
Auto-suggest helps you quickly narrow down your search results by suggesting possible matches as you type.
- Revenera Community
- :
- InstallShield
- :
- InstallShield Knowledge Base
- :
- How to Update All Components Using the Automation Interface
Subscribe
- Mark as New
- Mark as Read
- Subscribe
- Printer Friendly Page
- Report Inappropriate Content
How to Update All Components Using the Automation Interface
How to Update All Components Using the Automation Interface
Summary
This article provides instructions on how you can update different settings for a large amount of components at once using the automation interfaceSynopsis
Sometimes, it may be necessary to update the settings for all of the components in your project, or all of the components in a particular feature. If you are working with a large project then there may be many components and doing so using the InstallShield IDE can be very time consuming. For tasks like this, you can use InstallShield's automation interface which can open a project and modify its features and component data in many of the same ways that you would in the InstallShield interface.Discussion
Example using VBScriptHere is an example of how you can update the RemoteInstallation property for each component in a particular feature to run from source using VBScript.
1. Right click on your Desktop and create a new Text Document, then rename with a .vbs extension.
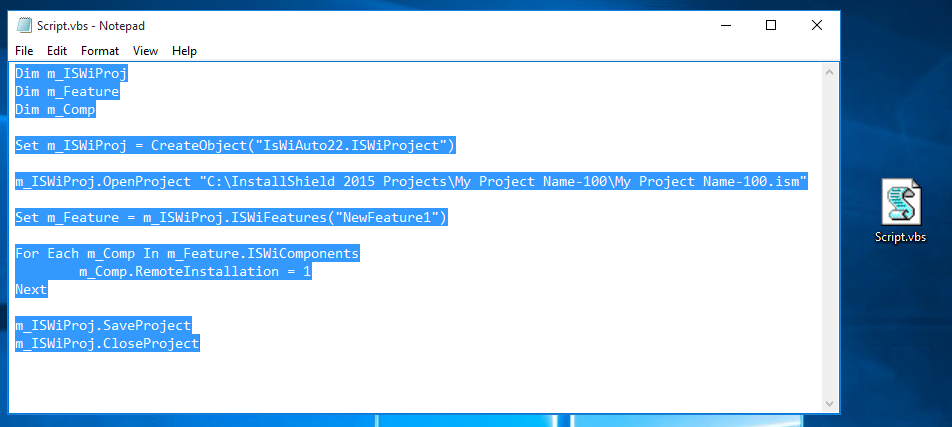
2. Right click on your vbs file and choose Edit, then enter the following script:
Dim m_ISWiProj
Dim m_Feature
Dim m_Comp
Set m_ISWiProj = CreateObject("IsWiAuto24.ISWiProject")
m_ISWiProj.OpenProject "C:\InstallShield 2015 Projects\My Project Name-100\My Project Name-100.ism"
Set m_Feature = m_ISWiProj.ISWiFeatures("NewFeature1")
For Each m_Comp In m_Feature.ISWiComponents
m_Comp.RemoteInstallation = 1
Next
m_ISWiProj.SaveProject
m_ISWiProj.CloseProject
3. Update the highlighted areas in the script with the path to your project, the name of the feature you'd like to update and the name of the automation object depending on the version of your InstallShield.
InstallShield 2018 - IsWiAuto24
InstallShield 2016 - IsWiAuto23
InstallShield 2015 - IsWiAuto22
4. After saving the script file you can run it in a command prompt using cscript.exe. If you're on a 64-bit OS you'll need to make sure to use cscript.exe from the SysWOW64 folder. The command line would be:
"C:\Windows\SysWOW64\cscript.exe" "C:\Users\<Username>\Desktop\Script.vbs"
Example using PowerShell
Here is an example of how you can update the Shared property to 'No' for each component in a particular feature using PowerShell
1. Open the PowerShell (x86) ISE and paste in the following code
$m_ISWiProj = new-object -comobject ISWiAuto24.ISWiProject
$strFile = "C:\\InstallShield 2015 Projects\\My Project Name-100\\My Project Name-100.ism"
$m_ISWiProj.OpenProject($strFile)
$m_Feature = $m_ISWiProj.ISWiFeatures.Item("NewFeature1")
foreach ($m_Component in $m_Feature.ISWiComponents)
{
$m_Component.SharedDLLRefCount = $false
}
$m_ISWiProj.SaveProject()
$m_ISWiProj.CloseProject()
2. Update the object name, project file location and feature name depending on what you would like to update
InstallShield 2018 - IsWiAuto24
InstallShield 2016 - IsWiAuto23
InstallShield 2015 - IsWiAuto22
3. Click the 'Play' button in PowerShell ISE or push F5 to run the script
Additional Information
HelpNet Article - InstallShield Automation InterfaceBlog Post - InstallShield Automation Tools
No ratings